|
|
 |
|
| The light command |
| With the light command, you can make objects more brighty, by creating a light source, and with a colour and an intensity of your choice , and then project this light upon the surrounding objects. This is especially useful in night scenes , and dark environments like caves and tunnels. |
| If you add the light command upon an object, then it brings light from the center of the object to the objects in the surrounding 3d-scene. |
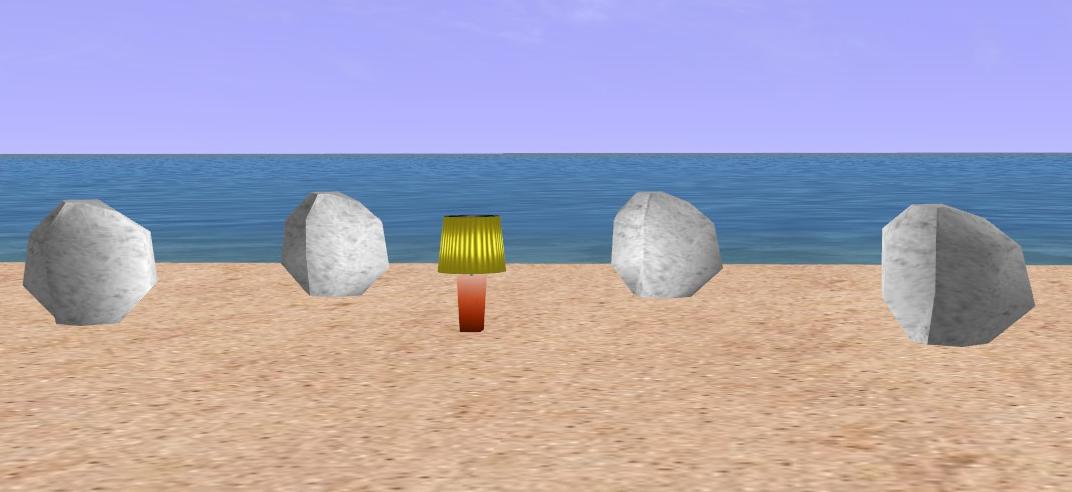
| lamp2.rwx |
| create light |
| The rock4.rwx -objects get the light from the lamp. |
|
 |
|
|
| Color |
| You can add a light color , you can also use hexadecimal color codes for that. The default light color is white. |
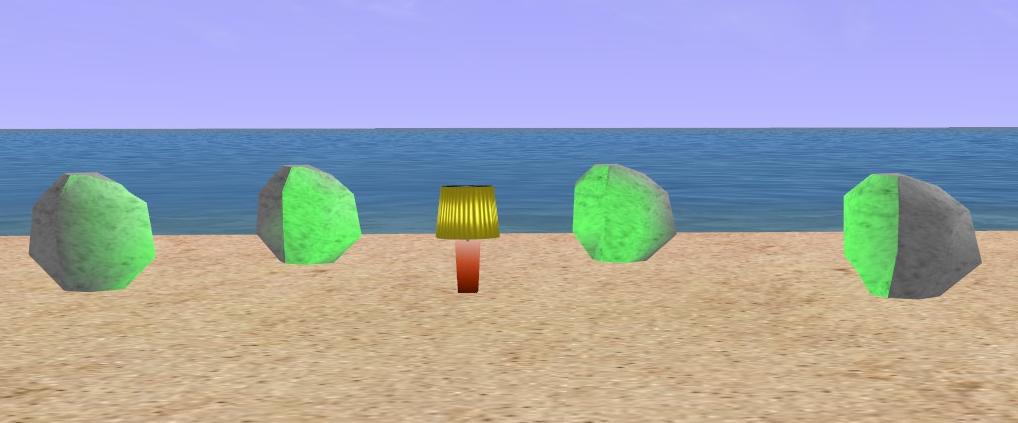
| create light color=green |
| |
| Brightness |
| You can add a color intensity with the option brightness, going from 0 to 10. The default value is 0.5. A value of 0 turns the light off |
| create light color=yellow brightness=1.5 |
|
 |
|
|
| Radius |
| Radius indicates the distance in meters in which the light source may shine. The default distance is 10 meters. This option is very useful, because with radius, you can prevent that the light shines through the walls. |
| create light color=blue brightness=10 radius=2 |
| As you can see, the strong blue light only reaches the rocks in a distance of 2 meters from the lamp. The outer rocks don't get any blue light at all. |
|
 |
|
|
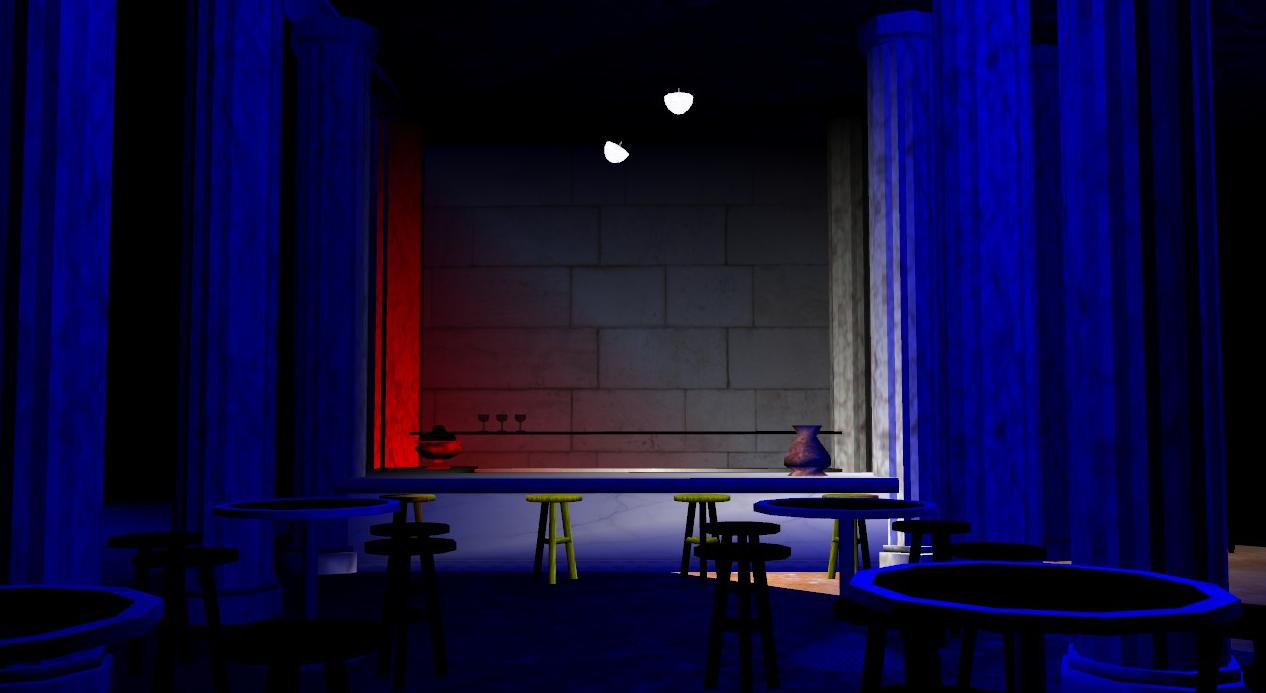
| Type |
| There are 2 types of light source : point and spot. The default value is point, where the light shines in all directions. By using spot, the light shines into a particular direction, by using the options angle and pitch. |
| |
| Angle |
| The angle indicates the how wide (in degrees) the light of the spot will shine. The default value is 45 degrees. |
| ceillamp.rwx |
| In this example we have a night scene .The white spot has an angle of 45 degrees. In the the command script, you can omit the angle and the light colour, because these are both default values. |
| create light brightness=10 type=spot |
| The red spotlight goes into a specific corner of the bar , the angle is here only 15 instead of 45. |
| create light brightness=10 color=red type=spot angle=15 |
|
 |
|
|
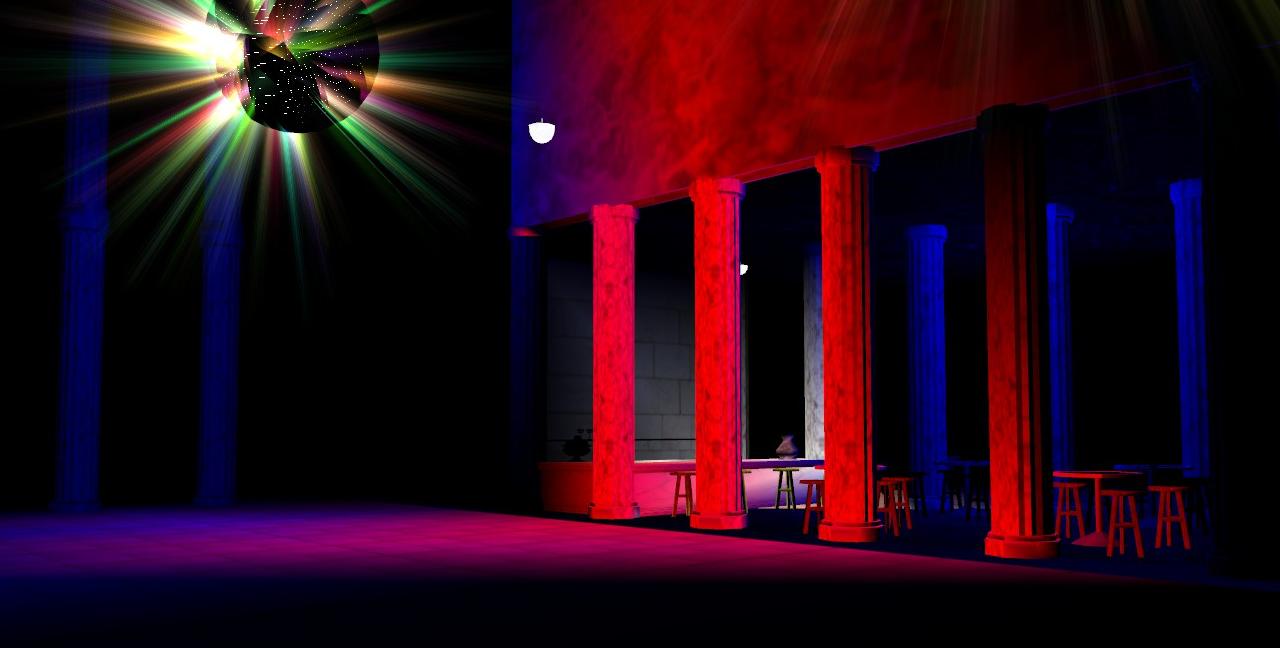
| Pitch |
| The option pitch indicates the direction of the spot light angle (in degrees). The default value is pitch=0, and in this case the spot light goes straight down. |
| A pitch value of 180 makes the spot light go straight up. If you want the spot from the side, then you can rotate the object axis. (see example above : the red spotlight has been rotated towards the corner of the bar) |
| ceillamp.rwx |
| create light brightness=10 color=red type=spot pitch=75 angle=60 |
| In this example the lamp object is not rotated, but the light source is rotated with 75 degrees : pitch=75, which is almost horizontal. And the spot has a wide angle, shining upon several columns and the floor and the upper wall. |
|
 |
|
|
| Visible off |
| Note also, that in the 3d scene, the ceillamp will be made invisible. This has not been done in the 2 examples above, but the objects with the blue light have been made invisible. The discoball at the left side is a particle emitter (=V4 object) and has nothing to do with the light command .But particle emitters (PE's) are also often used as a light source. |
| Also for this example, the soccerball objects have been made visible off. But upon the picture, the wall-object has been selected in building mode, so that the 2 soccerballs become visible. The wall itself is in reality white, but the 2 light sources create a fade-over of 2 colours. |
| wall003.rwx |
| create color white |
| soccer1.rwx |
| create visible off, light brightness:8 radius=3 color=green |
| soccer1.rwx |
| create visible off, light brightness:8 radius=3 color=blue |
|
 |
|
|
| Note: |
| Please keep in mind that not all the objects will become more brightly when using an object with the light command near them in the 3d scene. In this exemple, the bar, the columns, the wall , the glasses and vases light up, but the fruit inside the vase remains black. This has to do with the way these objects have been modeled : it depends on the diffuse component of the surface lighting properties of that object. |
| If an object has no diffuse lighting, light sources will not have any effect on it. The lower the diffuse of the object, the lower the light will be upon the object. |
|
 |
|
|
| Fx |
| The option fx, you can use one the the various light effects : these are blink, fire, flicker, flash, pulse , fadein and fadeout. For the effects fadein and fadeout, you need to use the trigger activate or bump to see the light effect. |
| |
| fire1.rwx |
| create light color=orange fx=fire |
| create light color=orange fx=flicker |
| create light color=orange fx=flash |
| create light color=orange fx=pulse |
| create light color=orange fx=blink |
| For these examples , you cannot see the light effects upon this picture, but only by going into the 3d world, here in the world Planets2 on position 0N 20E. |
|
 |
|
|
| Time |
| The option time is used for the interval (in seconds) for the effects pulse, blink, fadein and fadeout. The default time is 1 second. |
| |
| fire1.rwx |
| activate light brightness=10 color=yellow radius=4 fx=fadein time=5 |
| In this case, you must click upon the fire object. Then the light will start weakly and after 5 seconds , the light source will have a brightness of 10. |
| |
| Name / Global |
| You can also use another object to light up the fire , in this case you use the name command. The most command thing is a switch , to turn on the lights, in this case , the command script is on the switch object and not upon the lamp. |
| button.rwx |
| create sign "lights on" ; activate light brightness=10 radius=5 fx=fadein time=3 name=demo |
| fire1.rwx |
| create name demo |
| This way you can swith on all the lamps with the same name command, for several streets in your 3d scene. |
| You can also add global, so that the light goes on or off for the other visitors as well. |
|
|
|
|
 |
|
|