|
|
 |
|
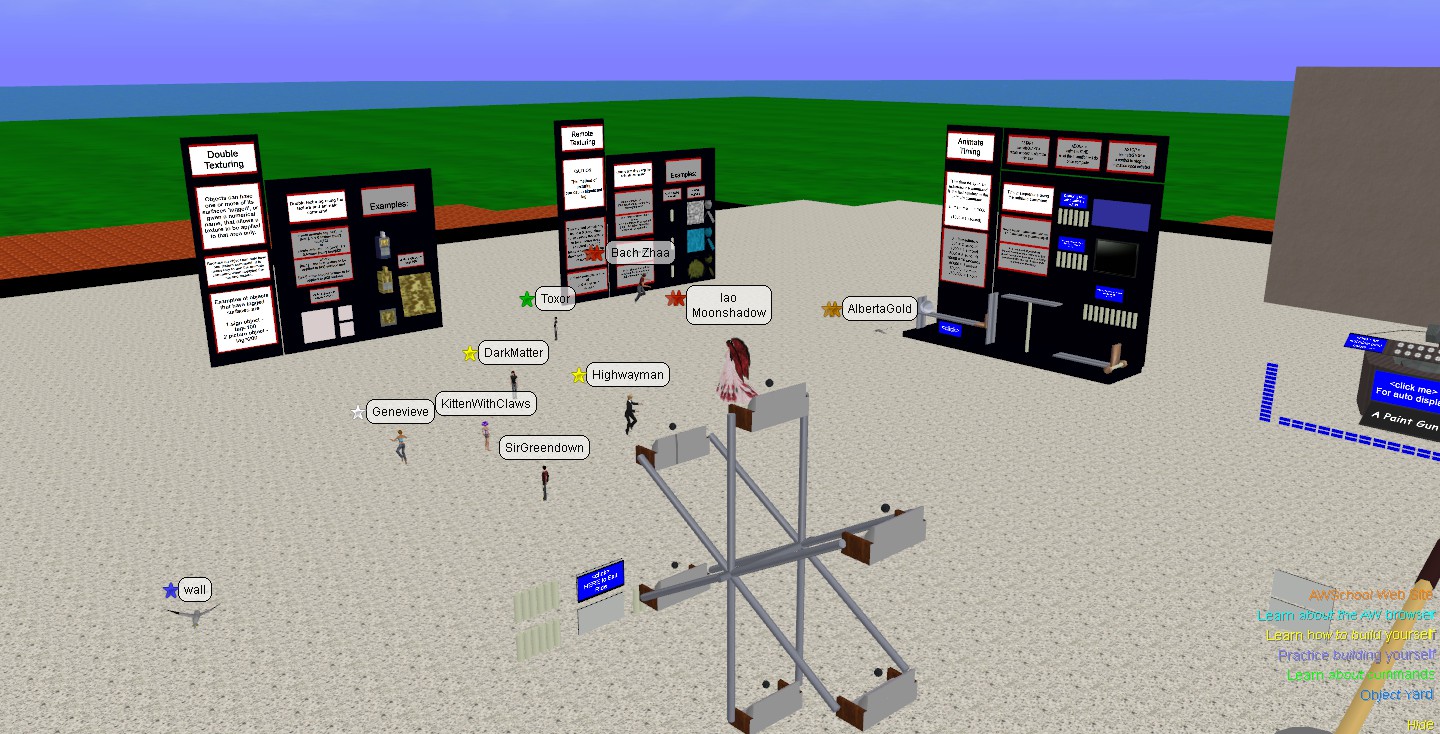
| From the tutorial park in the world AWSchool (35N 30E) , you can teleport to "Bach Zhaa's Astart Adone advanced tutorials" ( 32N 104E). Here you will find detailed information and examples about animate and timer commands.On position 35N 112E you have more info and examples about basic animation. And on position 36N 123E you will find several panels, each explaining a different application for the animate command. Lots of examples are rather complicated, but on this webpage, you will find some of the easiest examples. From the tutorial park, you can also teleport to other easy examples : the animate command (16S 44W) , astart/adone (66N 20E) , frame (60N 20E). |
| |
 |
|

In the animate command ,you will find 3 numbers following the command. The first number is the number of textures in the command (texture set) , the second number is the number of frames involved , the third number frame rate (speed in milliseconds -> 1000 = 1 second). There may be following other numbers, fro instance , for showing specific frames only and/or showing the frames in another order (instead of the alfabetical order). |
|
|
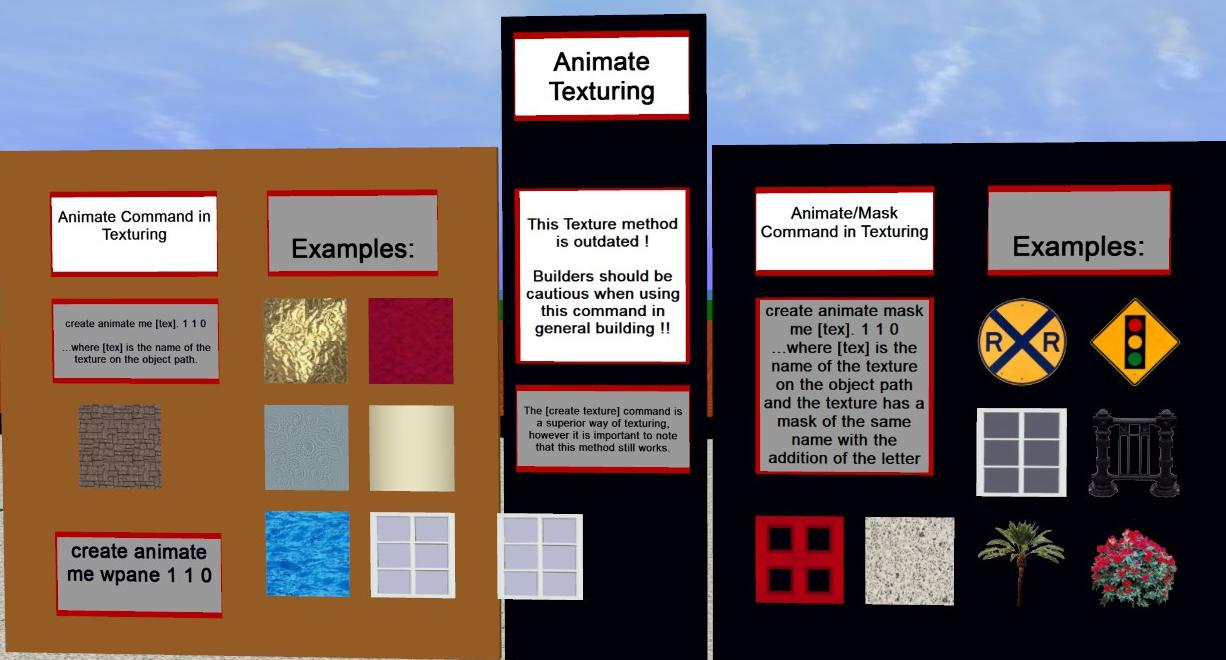
| 1.Texturing (with the animate command) |
| This animate texturing method is outdated , use instead the texture command (with a small difference of the description of the texture name) |
| pictwll2.rwx |
| create animate me wpane 1 1 0 -----> create texture wpane1 |
| create animate me ceiling. 1 1 0 ----> create texture ceiling |
| create animate me gold. 1 1 0 ----> create texture gold |
| create animate me pud 1 1 0 ----> create texture pud1 |
| create animate me water 1 1 0 ----> create texture water1 |
| 2. Mask texturing (with the animate command) |
| Also the mask texturing can be used either with the animate or the texture command |
| create animate mask me booth1. 1 1 0 ----> create texture booth1 mask=booth1m |
| create animate mask me shrub04. 1 1 0 --->create texture shrub04 mask=shrub04m |
| create animate mask me rail2. 1 1 0 ----> create texture rail2 mask=rail2m |
|
| 1. Texturing with the animate command: |
| create animate me [tex]. 1 1 0 |
| ...where [tex] is the name of the texture on the object path. |
| 2. Mask texturing with the animate command : |
create animate mask me [tex]. 1 1 0
|
| ...where [tex] is the name of the texture on the object path and the texture has a mask of the same name with the addition of the letter m. |
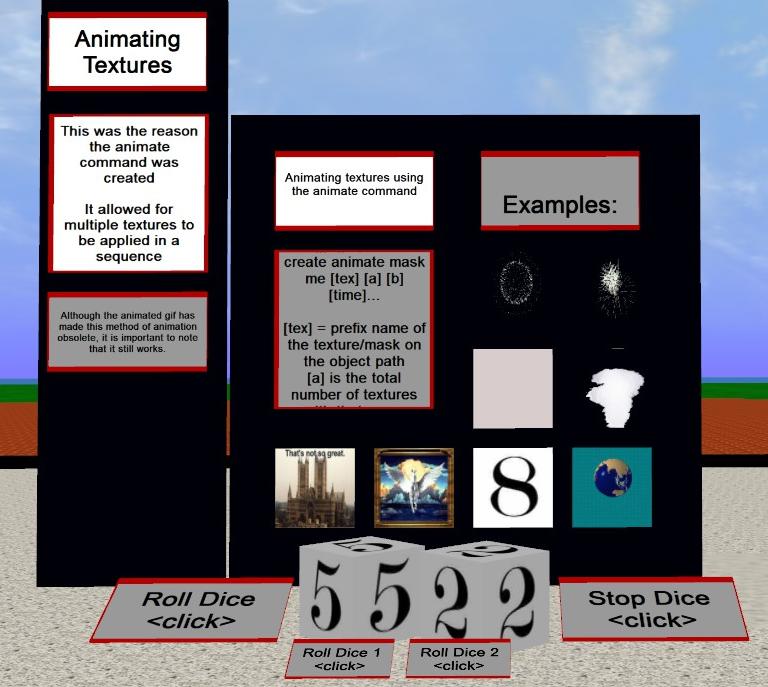
| 3. Animating textures |
| create animate mask me [tex] [a] [b] [time]... |
[tex] = prefix name of the texture/mask on the object path
[a] is the total number of textures with that name
[b] = number of frames in the texture animation
[time] = time in milliseconds for each frame |
| 1000 = 1 second. |
|
|
|
| 3. Animating textures |
| This is an animation created by a sequence of textures. The animation is only possible with textures in the object path (texture path) (= not for url-pictures) ,and the textures names must have the same prefix name. The 1000 or 2000 means the time that each texture image is shown : 1000 means an interval of 1 second. (Lots of animation are made nowadays with animated gifs, but this method is still useful.) |
| create animate me contest 9 9 2000 --> repeats a set of 9 pictures |
| create animate me poster 4 4 1000 --> repeats a set of 4 pictures |
| create animate me 0 10 10 1000 --> repeats the textured numbers from 0 till 9 |
| create animate me awd 8 8 200 ---> 8 images, repeating every 1.6 seconds |
| Also masked animations are possible : |
| create animate mask me steam 6 6 800 --> shows a steam animation of 6 images |
| create animate mask me fw 13 13 200 --> fireworks animation |
| create animate mask me fwb 13 13 400 --> another fireworks animation |
| You can also select certain frames of the animation, and even make the animation in reversed order.: |
| create animate me flat 12 2 1000 8 12 |
| ---> repeats 2 textures of a set of 12 textures but only the 8th and 12th texture |
| create animate me flat 12 3 1000 2 3 7 |
| ---> repeats 3 textures of this set : frames 2 3 and 7. |
|
 |
|
|
| 4. Animation menu - frames |
| With the animate command you can also create a menu, in which you can go back, go foward, or stop the animation. |
| ********** Dice Animation *************** |
| Click upon the "Roll dice"-sign to start the animation , click each time upon the "stop dice"-sign to stop the animation : |
| sign4.rwx ------ description : Roll Dice <click> |
| create sign bcolor=999999 color=0 q=100,color red;activate animate dice1 0 10 10 290 10 6 1 7 2 8 3 9 4 5,animate dice2 0 10 10 160 8 2 3 7 10 5 4 9 1 6 global |
| sign4.rwx ------ description : Stop Dice <click> |
| create sign bcolor=999999 color=0 q=100,color red;activate astop dice1,astop dice2 global |
| p2cube0200.rwx |
| create name dice1,texture 05 |
| p2cube0200.rwx |
| create name dice2,texture 02 |
| You can also make the animation for each dice seperately |
| sign4.rwx ------ description : Roll Dice 1 <click> |
| create sign bcolor=999999 color=0 q=100,color red;activate animate dice1 0 10 10 290 10 6 1 7 2 8 3 9 4 5 global |
| sign4.rwx ------ description : Roll Dice 2 <click> |
| create sign bcolor=999999 color=0 q=100,color red;activate animate dice2 0 10 10 160 8 2 3 7 10 5 4 9 1 6 global |
|
 |
| |
| This is the Wings3d tutorial center in the world Winter, located on position 78N 598W, and made by Keshi (#352322). |
| By clicking upon the "back"-button, you go to previous frame/image of the animation set. The "ahead"-button brings to to the next image. The tutorial for making this column consists of 94 frames. |
| |
|
|
|
| |
| ********** Picture Animation *************** |
| We already saw how to make an "automatic" picture animation of 9 images |
| pictwll2.rwx |
| create animate me contest 9 9 2000 |
| We can modify this into a "manual" animation. Here you need to click upon the pictwll-object in order to see the next frame image. |
| create animate me contest 9 9 2000 , astop; activate frame +1 |
| We can also add 2 signs (buttons) : one sign to go forward and one sign to go back. |
| pictwll2.rwx |
| create name ppp , animate me contest 9 9 500 , astop |
| eg-sign1 |
| create sign "previous" ; activate frame ppp -1 |
| create sign "next" ; activate frame ppp +1 |
|
| ********** Book presentation *************** |
| For this animation, we use 2 images ("pages") , and we go back or forward and see the next 2 images ("pages"), as if you are reading a book . We specify the frames that we want to see, in order to avoid that we see the same image ("page") twice. In total, there are 8 frames(pages): 4 frames for the left side, 4 frames for the right side. |
| pictwll2.rwx |
| create name pg1 ,animate me contest 8 4 2000 1 3 5 7, astop |
| create name pg2 ,animate me contest 8 4 2000 2 4 6 8 ,astop |
| eg-sign1 |
| create sign "previous" ; activate frame pg1 -1 , frame pg2 -1 |
| create sign "next" ; activate frame pg1 +1 , frame pg2 +1 |
|
| **** Book presentation **** |
| A better example to explain this, is by using textured numbers instead of images. The num-set consists of 75 textured numbers, and we use only 10 textures of it : 5 unpair numbers for the pages at the left side and 5 pair numbers for the pages at the right side. |
| pictwll2.rwx |
| create name p1,animate me num 75 5 100 1 3 5 7 9 , astop |
| create name p2,animate me num 75 5 100 2 4 6 8 10, astop |
| eg-sign1 |
| create sign "previous" ; activate frame p1 -1 , frame p2 -1 |
| create sign "next" ; activate frame p1 +1 , frame p2 +1 |
 |
| Now you can start making a real book : each page (text and pictures) must be stored into a texture image. Then you give the textures a name, followed by the page number. Then you must upload the textures into the objectpath of your world. |
If you don't want to specify the page numbers, you can use this method : first make an image set for the left pages (left01, left02,...) and a set for the right pages (right01,right02,...) , and you upload them to your objectpath, and then you use these commands : as an example for 10 pages in total : |
| create name p1,animate me left 10 5 100 , astop |
| create name p2,animate me right 10 5 100 , astop |
| The commands on the signs remains the same. |
|
|
|
| 5. Double/triple texturing |
| With the animate command you can only apply 1 texture upon an object , with the texture command you can also apply 1 texture, and with the picture command can also apply 1 texture. If you combine the 3 commands, then you can apply 3 textures upon an object, in addition to the base texture of the object. But however it is required that the object must be tagged . This tagging is done when modelling the object, e.g in Notepad or in Accutrans. The model can be textured and and in addition there are 3 surfaces tagged : eg. tag 101 , tag 102 and tag 200. Any tag number can be used, the choice is free , but : tag=100 is for sign objects, tag=200 is for pictures objects. |
| Only a small number of objects of the standard object path can be used for double/triple texturing, because they were modeled before the tag command existed, and were not designed for that. Some of the newer generation of objects have tagged surfaces. |
| The object new1 is tagged as sign object and as picture object, this means that you can apply 2 other textures for those surfaces : |
| news1.rwx |
| create animate tag=100 me metal1. 1 1 0,texture goldcurt tag=200 |
| thwallb1.rwx |
| create rotate 7.5 0 time=4 wait=2 smooth loop,animate tag=300 me metal1. 1 1 0,texture goldcurt tag=400 |
| frame9p.rwx |
| create animate me metal1. 1 1 0,texture goldcurt tag=200 |
| These are a few examples of applying 3 textures in the action command, the pictures must be stored in the texture path of the OP. |
| brit-ww2 .rwx |
| create animate tag=102 me roof4. 1 1 99 , texture concrete tag=101 , picture flat34.jpg |
create picture davegh0999.jpg, texture brit-plaster01 tag=101,
animate tag=100 me k-wooden1. 1 1 99 |
| The prim objects accept pictures, so when you open the models with Notepad or Accutrans, then you will see that they have only tag 200. (=picture object). And it means also that you can't use 2 textures for the prim objects. However ,if you absolutely want to use a second picture/texture on these objects (eg. inner wall texture), then you will have to add in Notepad or Accutrans a second tag number for the other side of the model, and upload the modified model into the object path. And then you apply the double texturing command. |
| Only problem which remains is that you don't know the tag numbers of all the objects. |
|
| Double Texturing (animate+texture command ) |
| create animate tag=[#1] me [tex1]. 1 1 0,texture [tex2] tag=[#2] |
| create animate me [tex1]. 1 1 0,texture [tex2] tag=[#2] |
| ...where [tex] is the name of the texture on the object path. |
| [tex2] = the second texture to be applied to [#2] surface |
| Triple Texturing (animate+texture+picture command ) |


|
|
|
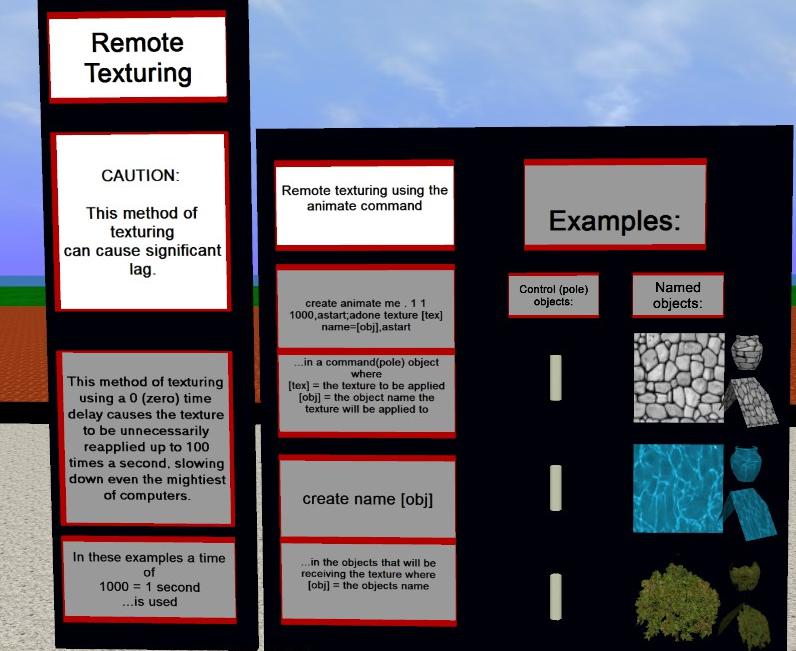
| 6. Remote texturing (with animate) |
| For remote texturing, we use the name command. The action command has been put for this example on a pole object, then you can apply this texture to all objects with the same name in the action field. |
| pole1m.rwx |
| create animate me . 1 1 1000,astart;adone texture stone3 name=panel1,astart |
| pictwll2.rwx |
| create name panel1 |
| pot6.rwx |
| create name panel1 |
| This command could cause a lot of lag. Better and easier is without the animate command : create texture stone3 name= panel1 |
|
 |
|
|
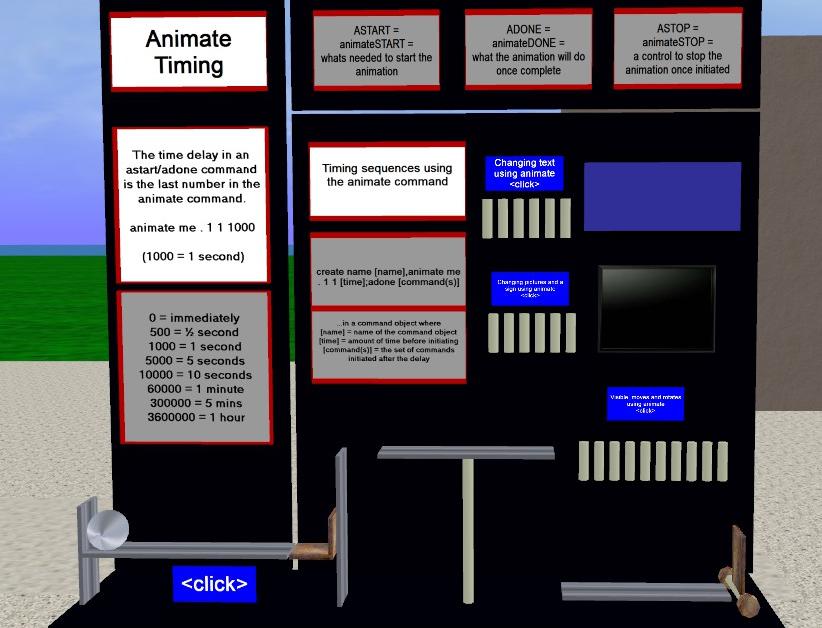
| 7. Animate Timing |
| The time delay in an astart/adone command is the last number in the animate command : animate me . 1 1 1000 (1000 = 1 second) (0 = immediately). |
| In this example we make 6 pole objects ,each of them showing a picture, which will appear on the pict1 object. In comparison with the animated textures where the frames needed to start with the same texture name, in this example you can apply any texture of the object path randomly and make a story or animated presentation. However , for each picture or frame, there is another pole object required. |
| pict1.rwx |
| create name apict1,texture monolith ;activate astart p1 global |
| pole1m.rwx |
| create name p1, animate me . 1 1 0;adone picture ad_may2.jpg name=apict1 |
| create name p1, animate me . 1 1 1000;adone picture ad1_4.jpg name=apict1 |
| create name p1, animate me . 1 1 2000;adone picture ad_coke.jpg name=apict1 |
| create name p1, animate me . 1 1 3000;adone picture ad1_2.jpg name=apict1 |
| create name p1, animate me . 1 1 4000;adone picture aw1.jpg name=apict1 |
| create name p1, animate me . 1 1 5000;adone picture monolith.jpg name=apict1 |
| In the example in AWSchool, the action command is longer, because the animation is also applied upon a sign object, showing a text animation. Also the first example is a text animation. The third example shows a sequence of animations, with moves , rotates and even gravity commands. |
| As each animation requires a lot of commands, it is obvious to use animated timing on several poles. In this tutorial area , you will find some other nice examples of animated timing : a paint gun, traffic lights, a dolfin , a box opening, an animated surprise box , a camera ride, billiards, a ferris wheel, a merry-go-round....etc... |
|
 |
|
|
 |
|
|
|
 |
|
|